August 19, 2026 · Updated August 24, 2026 · 12 min read
How Big Should a Profile Picture Be? Complete Size Guide for Social Media
On this page
- Why Profile Picture Size Matters
- The Best Universal Profile Picture Size
- Profile Picture Size Chart for Major Social Media Platforms
- Design for Circular Cropping
- Choose the Right File Format and Quality Settings
- How to Create a Strong Personal Profile Picture
- How to Make a Brand Profile Picture Work
- A Simple Workflow for Every Platform
- Frequently Asked Questions
- Conclusion
How Big Should a Profile Picture Be? Complete Size Guide for Social Media
Your profile picture is often the smallest image connected to your name—and one of the most important. It appears in search results, comments, direct messages, friend requests, meeting invites, and professional profiles. If it is blurry, badly cropped, or difficult to recognize at thumbnail size, it can weaken an otherwise strong online presence.
The right profile picture size depends on where you use it, but the best approach is simple: start with a high-quality square image, keep the subject centered, and export versions optimized for each platform. This guide explains the ideal profile picture size for major social networks, how to avoid awkward crops, and how to make a photo or logo look sharp everywhere.
Key Takeaways
- Use a square image for nearly every profile picture, even when the platform displays it as a circle.
- Create a master file at 1,080 × 1,080 pixels for flexible, high-quality use across platforms.
- Keep faces, logos, and important text inside the central 70–80% of the image.
- Export photos as JPG and logos or text-heavy graphics as PNG when possible.
- Check how your image looks at small sizes before publishing; profile pictures are usually viewed as thumbnails.
- Revisit platform requirements periodically, since display sizes and upload rules can change.
Why Profile Picture Size Matters
A profile picture is a visual shortcut. It helps people recognize you, remember your brand, and decide whether to click, follow, connect, or engage. Size affects more than sharpness—it also affects composition, trust, and consistency.
Display Size Is Not the Same as Upload Size
Most platforms display profile images at different dimensions depending on the device, placement, and screen resolution. A Facebook profile image may look large on a profile page but tiny beside a comment. LinkedIn may show your image prominently on your profile and much smaller in search results.
That is why uploading an image at the bare minimum is risky. A larger square source file gives the platform enough detail to resize the image cleanly.
For example, X recommends a 400 × 400-pixel profile image, while LinkedIn accepts profile photos starting at 400 × 400 pixels. X’s upload guidance and LinkedIn’s profile-photo requirements both reinforce the value of using a sufficiently large square image.
A Small Image Has a Big Job
Your profile picture needs to work in multiple contexts:
- A full-size profile header
- A small comment avatar
- A mobile search result
- A direct-message thread
- A notification or connection request
- A browser tab, embedded card, or shared link preview
A photo that looks excellent at 1,000 pixels can become unrecognizable at 40 pixels. The goal is not just to upload a large file—it is to design an image that remains clear when it is very small.
The Best Universal Profile Picture Size
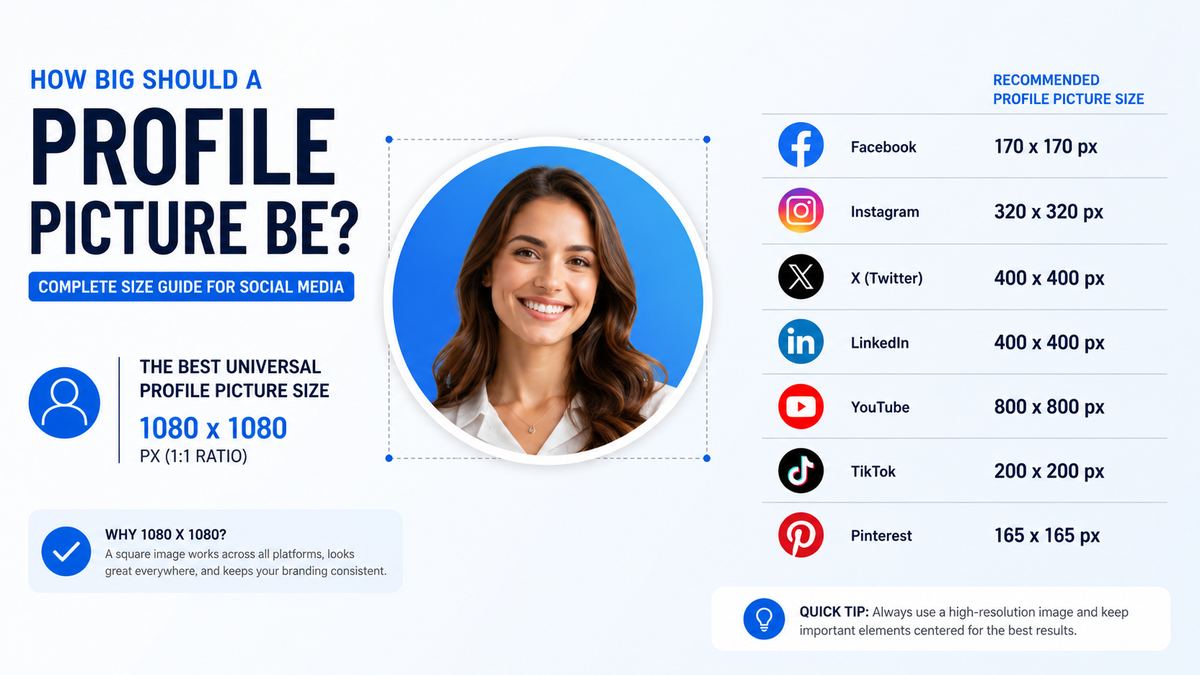
If you want one starting point that works well almost everywhere, create a square master image at 1,080 × 1,080 pixels.
Why 1,080 × 1,080 Pixels Works Well
This size is large enough for crisp display on high-resolution screens, easy to edit in common design tools, and compatible with the square format used by most platforms. It also gives you room to create smaller exports without sacrificing image quality.
A practical workflow is:
- Create or crop a master image at 1,080 × 1,080 pixels.
- Keep the subject centered with generous space around the edges.
- Export platform-specific versions only when a platform has a different requirement.
- Save the original editable file so updates are easy later.
For a professional headshot, the face should generally occupy about 55–70% of the frame. For a company logo, use enough empty space that the entire mark remains visible after circular cropping.
When to Use a Larger Source File
Use a larger source image—such as 2,000 × 2,000 pixels—when:
- You may print the image or use it in marketing materials.
- You expect to crop it into multiple versions.
- Your logo includes fine details.
- You are working with a professional photograph.
- You want to future-proof the file for changing platform requirements.
Avoid enlarging a small, low-resolution image. Upscaling can make an image technically larger, but it cannot restore missing detail.
Profile Picture Size Chart for Major Social Media Platforms
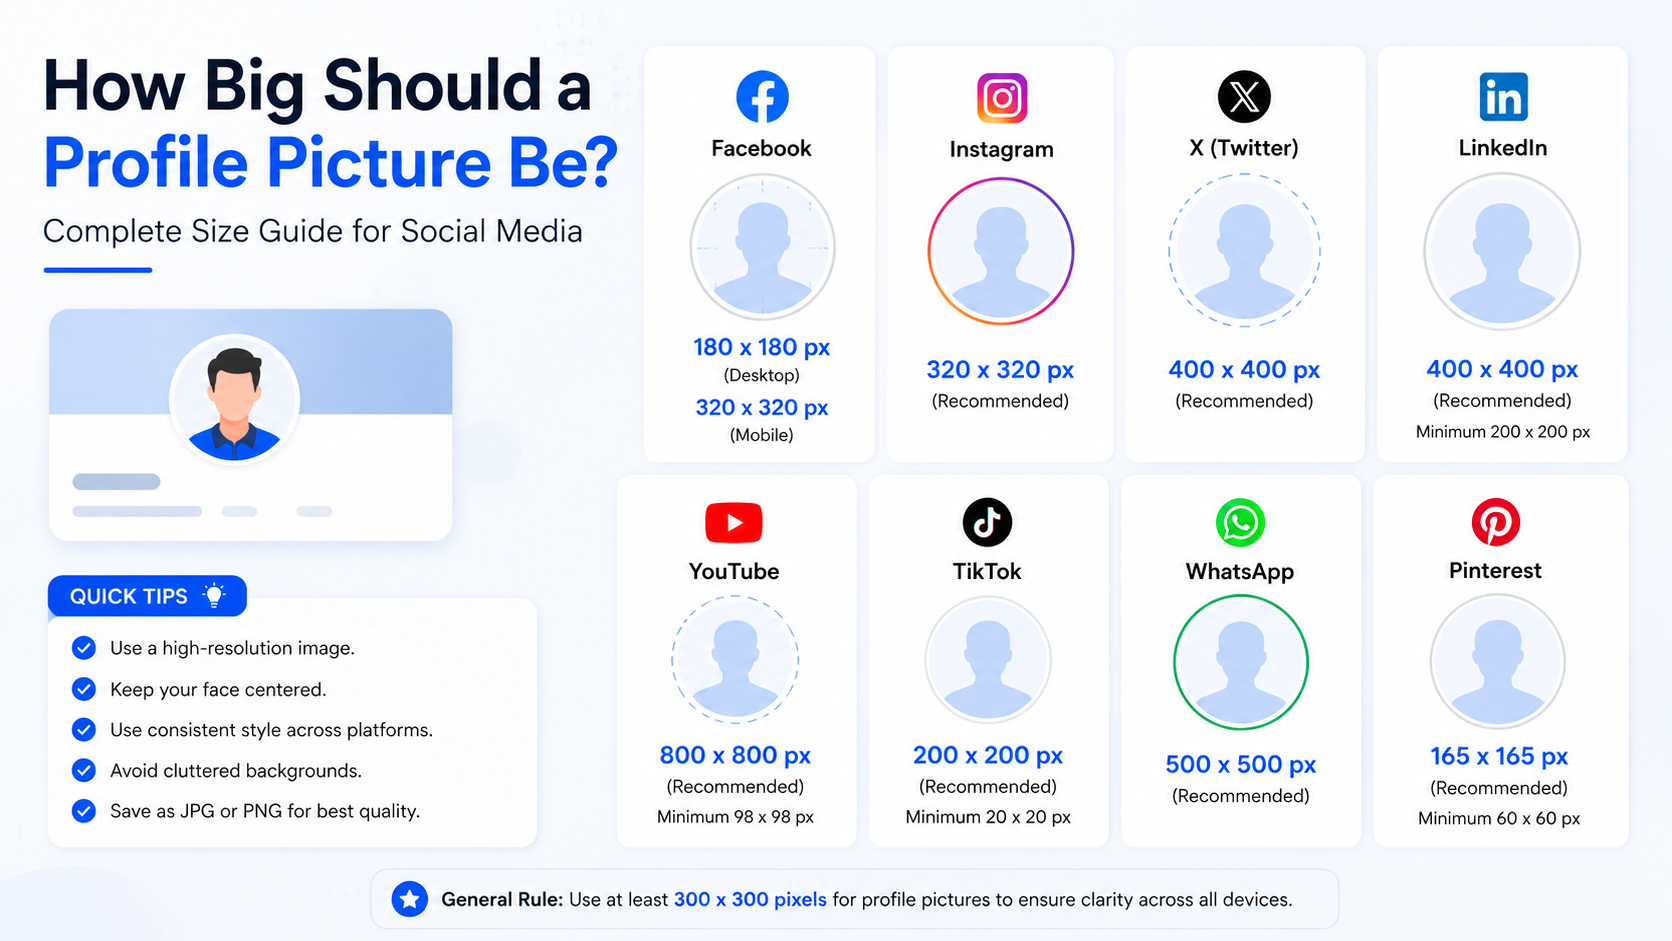
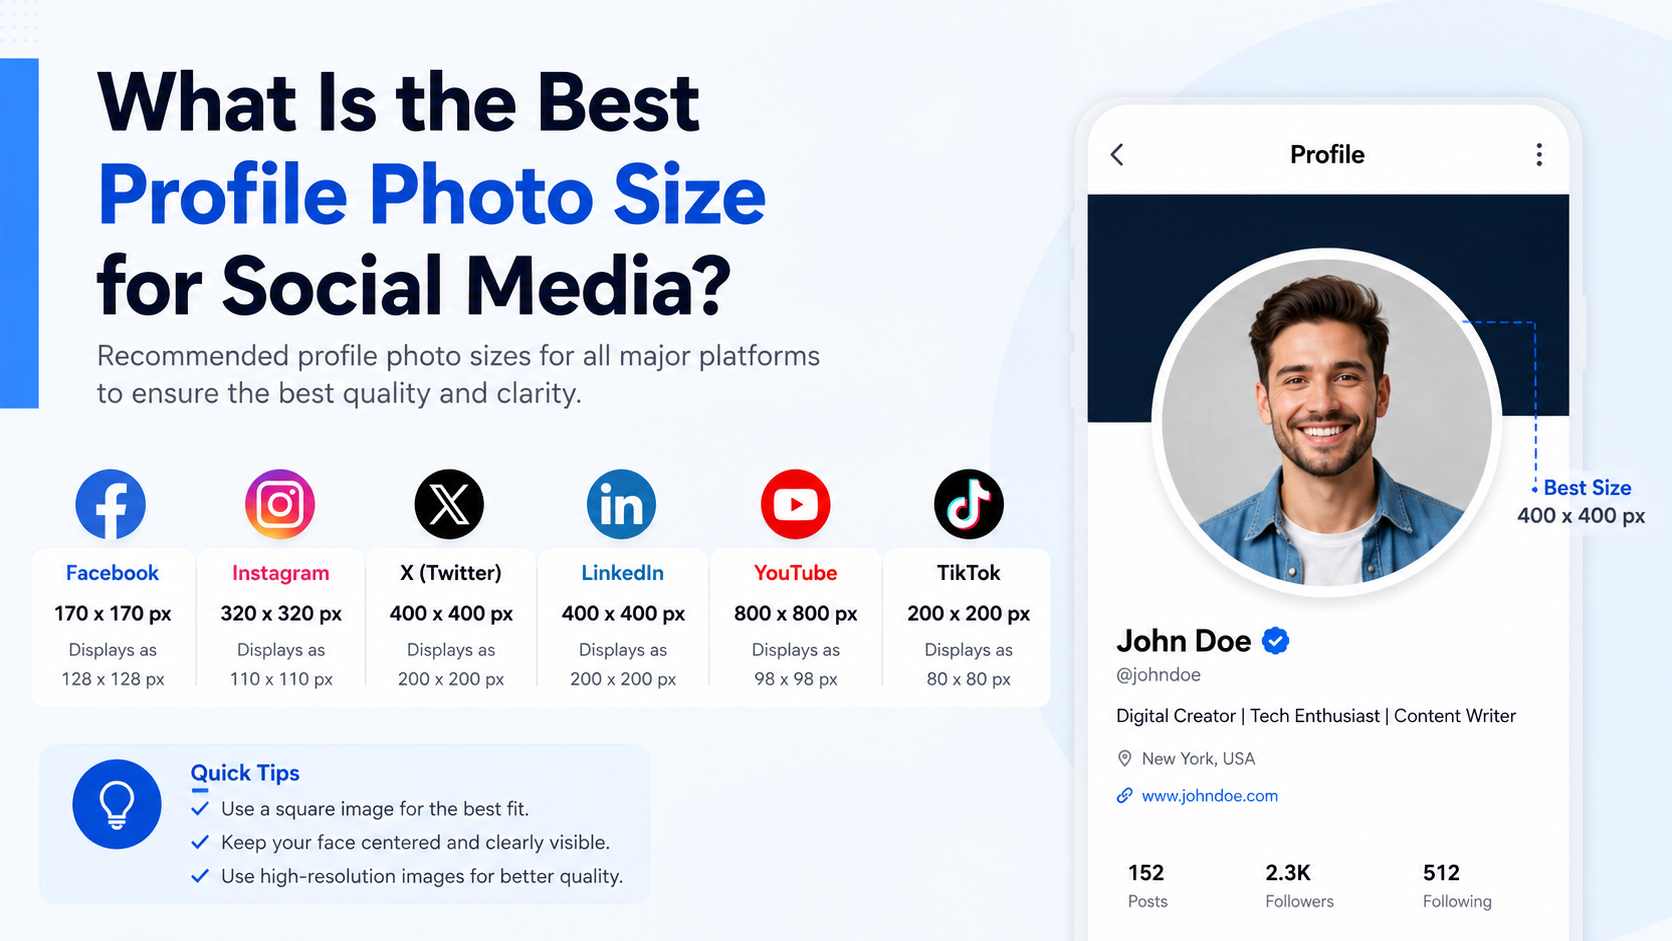
The following dimensions are practical working sizes for clean uploads. Platforms may display the image at smaller dimensions or adjust their technical requirements over time, so verify the upload screen before a major campaign or brand update.
Recommended Upload Sizes
| Platform | Recommended Profile Picture Size | Shape to Design For | Practical Note | |---|---:|---|---| | Instagram | 1,080 × 1,080 px | Square, displayed as circle | Keep the face or logo centered. | | Facebook | 320 × 320 px or larger | Square, displayed as circle | Facebook recommends 320 × 320 px for Page profile images. | | LinkedIn | 400 × 400 px minimum; 800 × 800 px preferred | Square, often circular | Use a clear, professional headshot. | | X | 400 × 400 px | Square, displayed as circle | Keep important details away from edges. | | TikTok | 200 × 200 px minimum; 1,080 × 1,080 px preferred | Square, displayed as circle | Strong contrast helps at small sizes. | | YouTube | 800 × 800 px | Square, displayed as circle | Ideal for channel icons and logos. | | Pinterest | 600 × 600 px | Square, displayed as circle | Use a recognizable face or simple brand mark. | | WhatsApp | 640 × 640 px or larger | Square, displayed as circle | Avoid tiny text and edge details. | | Discord | 512 × 512 px | Square, displayed as circle | PNG works especially well for logos. |
Facebook’s current guidance notes that Page profile pictures are displayed at varying sizes and recommends a 320 × 320-pixel image for best quality. Facebook Help Centre
Personal Profiles vs. Brand Profiles
A personal profile picture and a brand profile picture should follow different visual rules.
For personal accounts, prioritize:
- A clear view of your face
- Good lighting and natural color
- A simple background
- Clothing appropriate to your audience or industry
- A current, recognizable image
For brand accounts, prioritize:
- A simplified logo or icon
- High contrast against the background
- Consistent brand colors
- No small slogan, URL, or fine print
- Enough padding around the logo for circular crops
For example, a real estate agent may use a polished but approachable headshot on LinkedIn, Instagram, and Facebook. A coffee shop may use a simplified version of its logo rather than trying to fit its full business name into a tiny circular icon.
Design for Circular Cropping
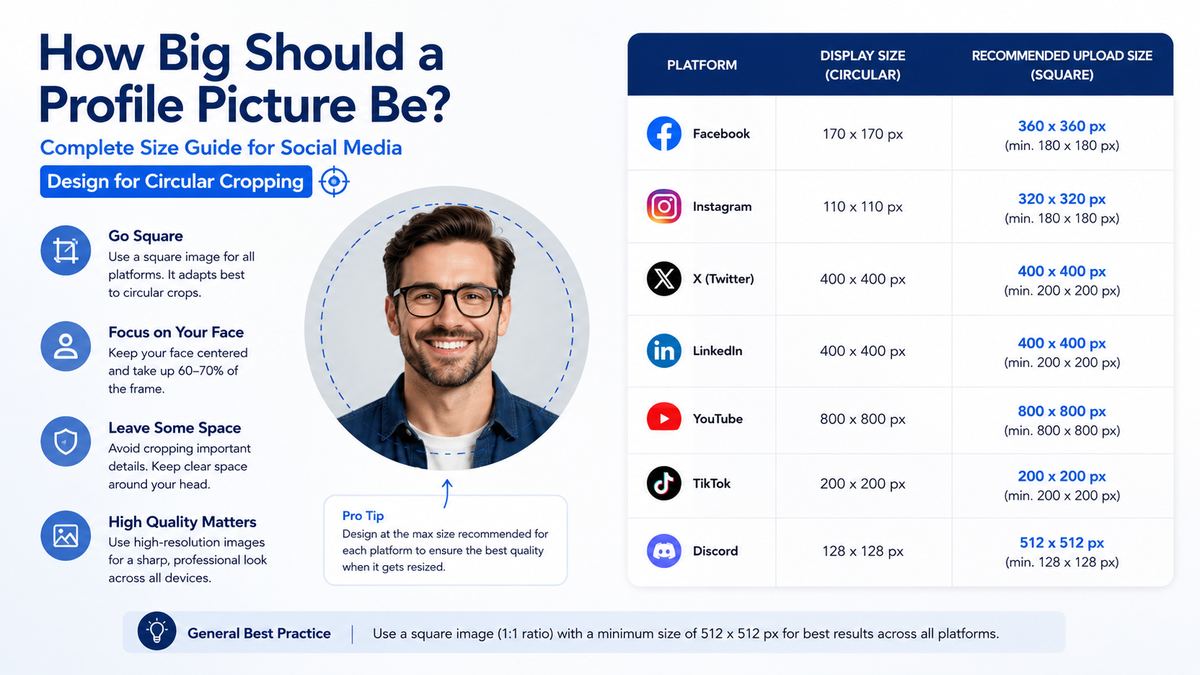
Even though most profile pictures are uploaded as squares, many platforms display them inside circles. This is one of the most common reasons profile pictures look poorly framed.
Use a Safe Zone
Think of your square image as having an invisible circle inside it. Anything near the corners could be hidden when the platform converts the image into a circle.
Keep the important content inside the central 70–80% of the canvas:
- Place faces near the center.
- Leave space above the head and around the shoulders.
- Avoid placing a logo’s edges near the corners.
- Do not put text around the outer border.
- Keep decorative elements away from the frame edges.
If a logo is rectangular, do not simply shrink it until it fits. Instead, create a profile-specific icon version: use a symbol, monogram, product mark, or simplified logo element.
Test Before You Publish
Before uploading, preview the image as a circle and at small dimensions. A good test is to shrink it to roughly 50 × 50 pixels. Ask:
- Can I instantly recognize the person or brand?
- Is the face visible and well-lit?
- Does the logo still make sense?
- Is any text too small to read?
- Are important elements being cut off?
If the image fails at thumbnail size, simplify it.
Choose the Right File Format and Quality Settings
Image dimensions are important, but file format and compression also affect the final result.
Use JPG for Photographs
JPG is usually the best choice for headshots, portraits, and other full-color photographs. It balances visual quality with manageable file size.
Use JPG when your image contains:
- Natural lighting
- Skin tones
- Background blur
- Detailed textures
- Complex color gradients
Export at high quality, but avoid unnecessarily huge files. Most platforms compress uploaded photos anyway.
Use PNG for Logos and Text
PNG is often better for logos, illustrations, icons, and graphics with sharp lines. It preserves crisp edges and handles transparency.
Use PNG when your profile image includes:
- A logo
- A monogram
- Bold graphic shapes
- Flat colors
- Small text, if text is unavoidable
- A transparent background
However, a transparent image may appear differently against light and dark platform themes. If brand consistency matters, consider placing the logo on a solid background color rather than relying on transparency.
Use sRGB Color Mode
Export images in sRGB, the standard color space for web and social media use. Other color profiles can shift colors after upload, making a carefully chosen brand color look dull, overly saturated, or inconsistent.
How to Create a Strong Personal Profile Picture
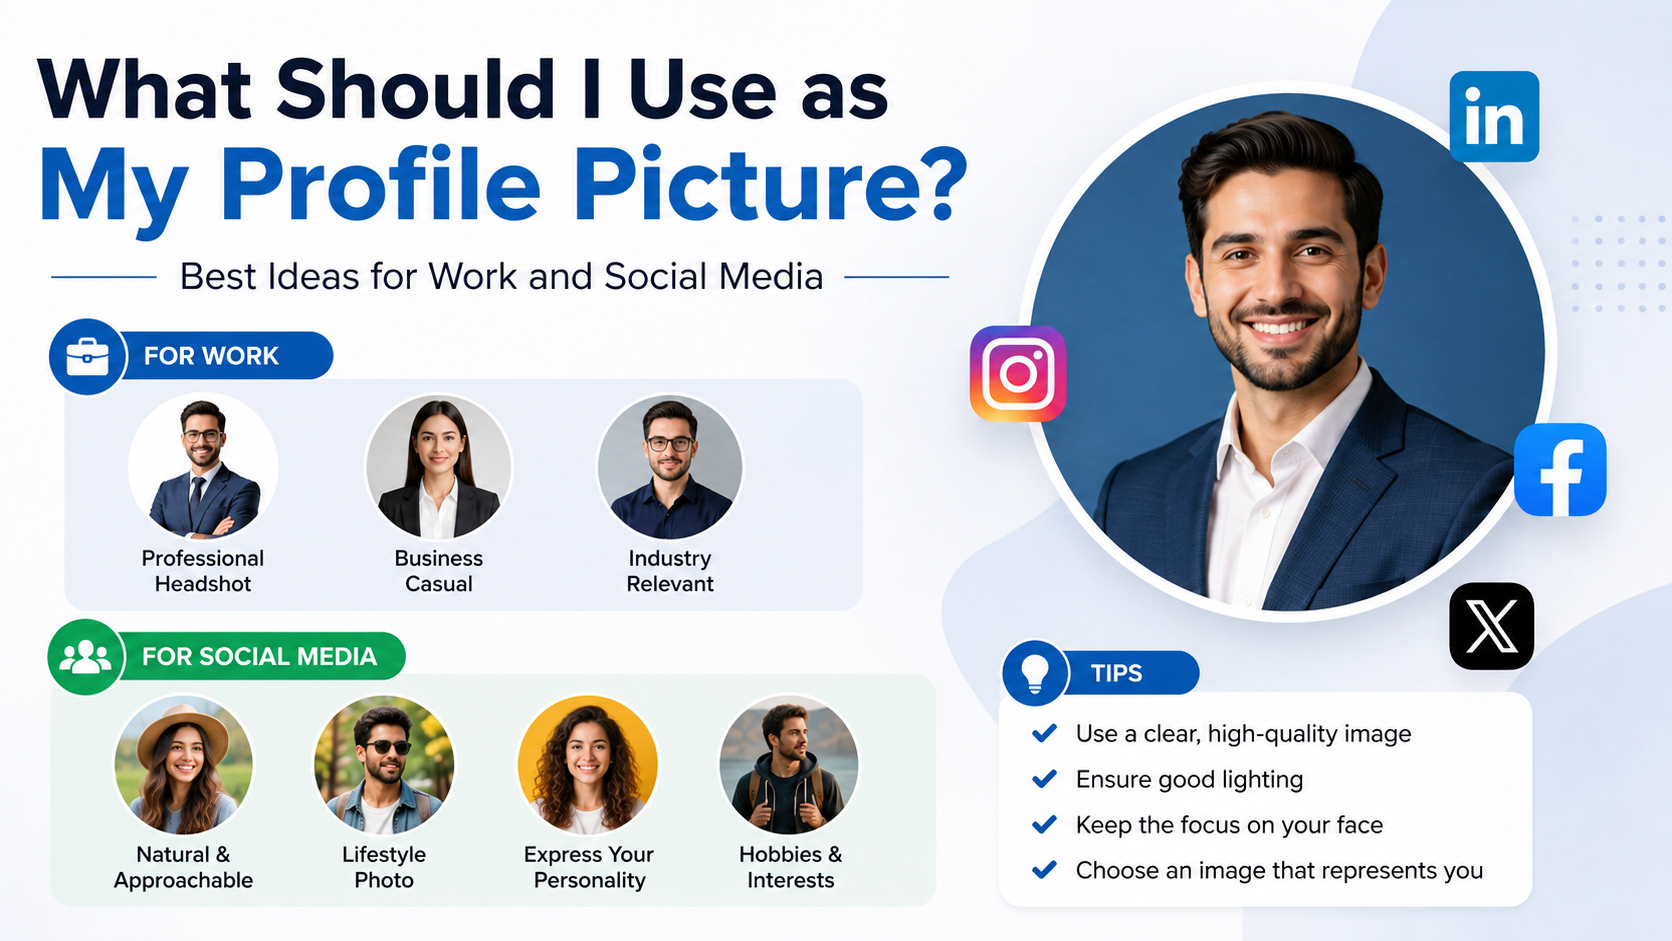
A technically perfect image can still underperform if the photo itself does not communicate the right message. Your profile picture should match the context in which people will see it.
Prioritize Recognition Over Artistic Style
A dramatic pose, distant landscape shot, or heavily filtered selfie may look interesting, but it is rarely the most effective choice for a profile image. People should be able to recognize you immediately.
For professional networks, use:
- A head-and-shoulders composition
- Direct or slightly angled eye contact
- A neutral or uncluttered background
- Natural expression
- Even lighting
- Clothing that fits your industry
For casual social accounts, you can be more expressive—but your face should still be visible and easy to identify.
Keep Your Image Current
An outdated profile image creates confusion, especially when you use it for networking, client communication, events, or hiring. Update your picture when your appearance changes significantly or when your current photo no longer represents your professional direction.
For consistency, use the same or a closely related image across the platforms where you want people to recognize you. This is especially helpful for consultants, job seekers, creators, speakers, and business owners.
How to Make a Brand Profile Picture Work
Brand profile pictures need to communicate quickly. At small sizes, complexity disappears.
Simplify Your Logo
Your full logo may include a wordmark, tagline, icon, legal symbol, and detailed illustration. That is useful on a website header, but too much for a social avatar.
Create a dedicated social profile icon that uses:
- Your symbol or monogram
- One clear visual element
- High-contrast colors
- A simple background
- Consistent brand styling
For example, a fitness studio named “Northline Strength & Performance” may use an “N” monogram within its brand colors rather than trying to display the full company name.
Avoid Common Brand Avatar Mistakes
Avoid these issues:
- Long business names in tiny type
- Thin lines that vanish at small sizes
- Low-contrast color combinations
- Complex illustrations with too many details
- A logo placed too close to the edge
- Inconsistent avatars across social platforms
Your profile image should support recognition, not function as a miniature brochure.
A Simple Workflow for Every Platform
You do not need to redesign your profile picture from scratch for every account. Build a reliable system.
Create a Master Asset
Start with a square, high-resolution master image. For most users, 1,080 × 1,080 pixels is ideal. Keep the original in an editable format and maintain a clean export version.
Then create a small set of variations:
- Standard square image
- Circular-crop-safe version
- Light-background version
- Dark-background version
- Simplified logo version for small displays
This approach is especially useful for organizations with multiple team members, locations, or social accounts.
Perform a Cross-Platform Check
After uploading, review the image on desktop and mobile. Check it in comments, messages, search results, and profile pages—not just the large profile view.
Use this checklist:
- Is the image sharp?
- Is the crop centered?
- Is the face or logo clearly visible?
- Does it look good in both light and dark mode?
- Does it match your other channels?
- Is the image current and on-brand?
A few minutes of review can prevent months of using a profile picture that does not represent you well.
Frequently Asked Questions
What is the best profile picture size for all social media?
A square image at 1,080 × 1,080 pixels is an excellent universal starting point. It provides enough resolution for most platforms while remaining easy to crop, resize, and reuse. Keep the key content centered so the image also works when displayed in a circle.
Should a profile picture be square or round?
Upload a square image in most cases. Many platforms automatically display profile pictures as circles, but the uploaded file is generally square. Designing for a square canvas with a circular safe zone gives you the best flexibility.
How much of my face should be visible in a profile photo?
For a professional profile picture, your face should usually fill about 55–70% of the frame. A head-and-shoulders crop works well because it keeps your features recognizable at small sizes without feeling too close or cramped.
Is PNG or JPG better for a profile picture?
Use JPG for photographs and PNG for logos, illustrations, or graphics with text and sharp edges. PNG is especially useful when you need clean logo lines or transparent backgrounds, while JPG is typically more efficient for natural photos.
Why does my profile picture look blurry after uploading?
Blurriness usually comes from uploading a small image, using a heavily compressed file, enlarging a low-resolution image, or allowing the platform to crop an image too aggressively. Start with a high-quality square source file and avoid repeatedly saving and re-uploading compressed versions.
Conclusion
The ideal profile picture size is not just about pixels—it is about clarity, crop safety, consistency, and recognition. Start with a high-quality 1,080 × 1,080-pixel square image, keep important details centered, and use platform-specific sizing where needed.
Whether you are building a personal brand, applying for jobs, representing a business, or growing a social audience, take a few minutes to audit your current profile images. Update the weakest one first, test it at thumbnail size, and make sure every platform presents a clear, recognizable version of you or your brand.